The Best Pre-Staining Preparation Techniques for Long-Lasting Results
Proper preparation is the foundation for a long-lasting, professional finish when staining a wood fence. Without the right pre-staining techniques, even the highest-quality stain may peel, fade, or fail to protect the wood from moisture and UV damage. Professional fence staining services follow a meticulous process to clean, repair, and treat the wood, ensuring the stain adheres evenly and provides maximum protection.
Here are five essential pre-staining preparation techniques that will help achieve a durable and beautiful finish.
Table of Contents
Key Takeaways✔ Cleaning the wood fence removes dirt and mold, allowing the stain to adhere evenly and last longer. ✔ Removing old stains from a wood fence ensures the new stain penetrates properly and provides consistent color. ✔ Repairing cracks, splits, and damaged boards creates a smooth surface and prevents future deterioration. ✔ Brightening the wood restores its natural color and improves stain absorption for a more even finish. ✔ Choosing the right stain type, whether transparent or solid, impacts durability and the final look of the fence. ✔ Staining during mild weather with low humidity ensures proper drying and prevents uneven coverage. ✔ Regular cleaning, touch-ups, and reapplication every 2 to 5 years maintain the stain’s color and protective qualities. |
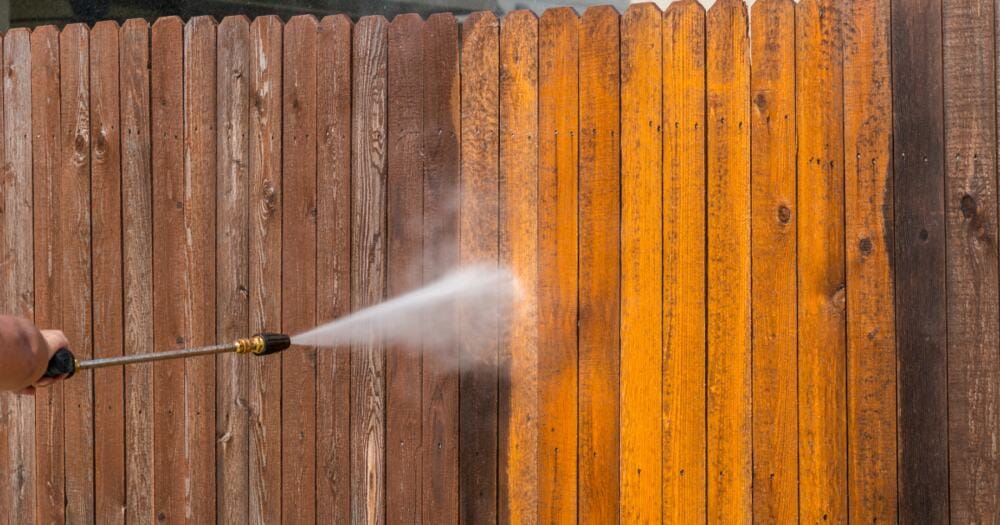
1. Clean the Surface Thoroughly
Proper cleaning is the first and most important step when preparing to stain a wood fence. Dirt, mold, and old stain residue prevent the stain from properly adhering to the wood, leading to uneven coverage and premature fading. Professional fence staining services always begin with a deep clean to ensure the wood surface is ready to absorb the stain effectively.
How to Clean a Wood Fence Before Staining
- Remove Surface Dirt and Debris: Use a stiff brush or a power washer on a low setting to scrub away dirt, cobwebs, and surface grime. A gentle yet thorough cleaning prevents surface buildup from interfering with the stain’s ability to penetrate the wood.
- Treat Mold and Mildew: If there are signs of mold or mildew, apply a wood-safe cleaner or a mixture of water and white vinegar (one part vinegar to three parts water). Let it sit for about 10 minutes before scrubbing the area with a brush, then rinse thoroughly with clean water.
- Let the Fence Dry Completely: After cleaning, allow the fence to dry for at least 24 to 48 hours, depending on weather conditions. Staining wood fence when it’s still damp will prevent the stain from penetrating properly, leading to uneven color and reduced durability.
2. Remove Old Stain or Paint
Removing old stain from a wood fence is crucial for proper stain adhesion and an even finish. Any leftover stain or paint creates a barrier that prevents the new stain from penetrating the wood. Staining wood fence services always strip away old coatings to ensure the new stain bonds correctly and provides long-lasting protection.
How to Remove Old Stain from a Wood Fence
- Use a Power Washer for Loose Stain: A power washer set to a low-to-moderate setting effectively removes loose or peeling stain. Keep the nozzle about 12 inches away from the wood to prevent damage, and work in even strokes to avoid gouging the surface. Let the fence dry completely after washing.
- Apply a Wood Stain Stripper: For stubborn or deeply embedded stains, apply a wood stain stripper using a paintbrush or garden sprayer. Allow the stripper to sit for 15 to 30 minutes (or follow product instructions), then scrub the surface with a stiff brush to lift the stain. Rinse thoroughly with clean water and allow it to dry.
- Sand to Remove Remaining Residue: Removing old stain from a wood fence is crucial for effective sanding. After the surface dries, sand the wood using medium-grit sandpaper (60-80 grit) to remove any remaining residue and smooth out the surface. This step opens the wood grain, allowing the new stain to absorb evenly and adhere better.
3. Repair and Restore Damaged Boards
After removing old stain from a wood fence. Addressing structural issues before staining ensures a smooth and uniform finish. Cracked, warped, or rotting boards can cause uneven stain absorption and reduce the overall lifespan of the wood. Professional fence staining services often include board replacement and repair as part of the preparation process.
How to Repair a Fence Before Staining
- Replace or Reinforce Loose or Broken Boards: Inspect the fence for cracked, warped, or loose boards. Remove damaged boards and replace them with pressure-treated wood or cedar. Secure any loose boards with galvanized nails or screws to prevent future movement.
- Fill Cracks and Holes: Use a wood filler or exterior-grade caulk to seal small cracks, holes, or knots in the wood. Let the filler dry completely, then sand the area smooth to create a uniform surface that will absorb stain evenly.
- Check for Rot and Decay: Use a screwdriver or knife to test for soft spots that may indicate rot. If rot is present, remove the affected section and replace it with treated wood. This step helps protect the fence from moisture damage and extends the lifespan of the stain.
4. Brighten the Wood for Better Stain Absorption
Brightening the wood helps restore the natural color of the fence and improves stain absorption. Over time, exposure to sunlight and weather can cause wood to gray and lose its original tone. Fence refinishing and staining services often include brightening to enhance the final result.
How to Brighten a Wood Fence Before Staining
- Apply a Wood Brightener: After cleaning and sanding, apply a wood brightener using a pump sprayer or brush. The brightener neutralizes the wood’s pH, removes tannin stains, and restores the wood’s natural tone. Let it sit for 10 to 15 minutes, then rinse thoroughly.
- Use Oxalic Acid for Gray or Weathered Wood: Oxalic acid-based wood brighteners work well on gray or weathered wood. Mix the brightener according to the manufacturer’s instructions, apply it evenly, and scrub the surface with a stiff brush before rinsing.
- Let the Wood Dry Completely: Once the brightener is rinsed off, allow the fence to dry for at least 24 hours. Staining wood fence while the surface is damp will prevent proper stain absorption and cause uneven coloring.
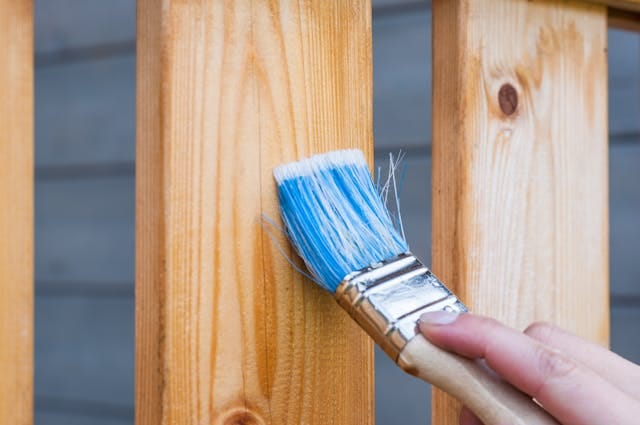
5. Choose the Right Stain for Maximum Protection
Selecting the right stain is essential for protecting the wood and achieving the desired look. The choice between transparent vs. solid stain for fences impacts how the wood grain shows through and how well the fence withstands weathering. Professional fence staining services can recommend the best stain based on wood type, exposure, and climate.
How to Select the Right Stain for a Wood Fence
- Consider Transparent vs. Solid Stain for Fences: Transparent stain enhances the natural wood grain, providing a more rustic look with moderate protection from UV rays and moisture. Solid stain offers maximum protection and color consistency, making it ideal for older fences or wood with imperfections.
- Choose Between Oil-Based and Water-Based Stains: Oil-based stains penetrate deeply into the wood, offering superior protection against moisture and UV damage. Water-based stains dry faster, resist mildew, and provide easier cleanup. Fence refinishing and staining professionals often recommend oil-based stains for harsh weather conditions.
- Select a Stain Compatible with the Wood Type: Different types of wood absorb stain differently. Softwoods like pine require more porous stains, while hardwoods like cedar need a product that penetrates the dense grain. Professional fence staining services will match the stain type to the specific wood species for the best results.
How to Test Stain Colors Before Applying
Testing stain colors before applying them to a wood fence is essential for achieving the desired finish. Different stains can appear darker or lighter depending on the wood type, previous coatings, and weathering. Professional fence staining services in Prospect, CT, often test multiple shades to ensure a consistent, even result that enhances the natural beauty of the wood.
1. Test on a Scrap Piece of the Same Wood
Testing on a scrap piece of wood from the same fence ensures an accurate color match. Wood species absorb stain differently, so testing on the actual type of wood being stained will reveal how the color will look once it dries. Professional fence staining services often keep spare boards for this purpose to avoid inconsistencies.
2. Apply the Stain to an Inconspicuous Area of the Fence
If no spare wood is available, test the stain on a hidden section of the fence, such as behind a gate or in a corner. Apply a small amount of stain using the same technique that will be used for the full application (brush, roller, or sprayer). Let it dry completely, as the color will darken slightly once cured.
3. Compare Transparent vs. Solid Stain for Fences
Testing both transparent and solid stains on the same wood allows for an easy side-by-side comparison. Transparent stain enhances the wood grain, while solid stain provides a more uniform, opaque finish. Professional fence refinishing and staining services can recommend which option will work best based on the wood’s condition and the overall look desired.
4. Test Under Different Lighting Conditions
Stain can look different depending on the time of day and lighting conditions. View the test area in both direct sunlight and shade to see how the color changes. Testing under various lighting conditions ensures that the stain will look consistent regardless of the weather or time of day.
5. Test More Than One Coat
Some stains, especially transparent stains, may require multiple coats for full coverage and protection. Apply a second coat on a small test area to see how the color deepens and whether the wood absorbs it evenly. Professional fence staining services often test for multi-coat compatibility to prevent issues like peeling or uneven drying.
6. Let the Stain Fully Dry Before Making a Decision
Stain colors can look different when wet compared to when fully dried and cured. Allow at least 24 to 48 hours for the stain to dry completely before evaluating the final color. Professional fence staining services understand the importance of proper drying time and can adjust the process if the color isn’t right.
Choosing the Right Time of Year for Staining
Timing plays a crucial role in the success and longevity of staining a wood fence, contributing to the industry’s steady growth over the past five years, with revenue expected to reach $14.8 billion in 2025. Temperature, humidity, and weather conditions all affect how well the stain absorbs and dries.
Professional fence staining services in Prospect, CT, understand the importance of choosing the right season to ensure even coverage, proper adhesion, and long-lasting results.
1. Stain During Mild Temperatures (50°F to 85°F)
Stain adheres and dries best when the temperature is between 50°F and 85°F. Extreme heat causes the stain to dry too quickly, leading to streaks and uneven absorption, while cold temperatures prevent proper curing. Professional fence staining services often schedule staining jobs in early spring or fall to take advantage of mild weather.
2. Avoid Staining in Direct Sunlight
Direct sunlight causes the stain to dry unevenly and too quickly, leading to lap marks and blotches. Staining should be done early in the morning or late in the afternoon when the sun is less intense. Professional fence staining services use shading techniques or work on overcast days to avoid issues caused by direct sun exposure.
3. Choose a Low-Humidity Day
High humidity slows down the drying process and can cause the stain to remain tacky or develop a cloudy finish. Ideal humidity levels for staining wood fence surfaces are between 40% and 60%. Professional fence staining services monitor weather patterns and choose low-humidity days to ensure proper drying and even color.
4. Watch the Forecast for Rain
Stain needs at least 24 to 48 hours of dry weather to fully cure. Rain can wash away fresh stain or cause water spots and streaking. Professional fence staining services carefully plan around the weather forecast, rescheduling if rain is expected within two days of application.
5. Early Fall or Late Spring Are Ideal Seasons
Early fall and late spring provide the most stable weather conditions for staining wood fences. These seasons typically offer moderate temperatures, lower humidity, and less rainfall, which allows the stain to penetrate and cure properly. Professional fence staining services often recommend these times of year for the best results and longest-lasting finish.
How to Maintain Fence Stain
Proper maintenance is key to preserving the color, finish, and protection of a stained wood fence, with the average cost to stain a deck around $850. Over time, exposure to sunlight, moisture, and temperature changes can cause the stain to fade or wear away.
Professional fence staining services recommend regular upkeep to extend the lifespan of the stain and keep the fence looking its best.
1. Clean the Fence Annually
Dirt, mold, and mildew build up over time and can break down the stain’s protective layer. Use a mild detergent and water, scrubbing with a soft brush to remove surface dirt and grime. Professional fence staining services often use low-pressure washing to clean the fence without damaging the stain or wood fibers.
2. Apply a Protective Topcoat
A clear topcoat adds an extra layer of UV and moisture protection over the stain. This helps prevent fading, water damage, and cracking, especially in areas with harsh weather. Professional fence staining services can recommend the best topcoat based on the type of stain and local climate conditions.
3. Repair Damage Immediately
Small cracks, splits, or chipped stain should be repaired quickly to prevent moisture from penetrating the wood. Lightly sand the damaged area and apply a small amount of matching stain. Professional fence staining services often provide touch-up services to address wear and tear before it worsens.
4. Trim Nearby Vegetation
Plants, vines, and grass growing against the fence trap moisture and promote mold growth, which can break down the stain. Keep plants trimmed at least 6 inches away from the fence to allow for proper air circulation. Professional fence staining services often advise homeowners to maintain this distance to prevent moisture-related damage.
5. Restain Every 2 to 5 Years
The lifespan of a fence stain depends on the type of stain used and the climate. Transparent stains typically need to be reapplied every 2 to 3 years, while solid stains can last up to 5 years. Professional fence staining services can assess the condition of the fence and recommend the right time for restaining to maintain optimal protection and appearance.
Frequently Asked Questions (FAQs)
How can weather conditions affect the outcome of staining a wood fence?
Extreme weather conditions, such as high heat, cold, or humidity, can impact how well a stain adheres and dries. Hot weather causes the stain to dry too quickly, leading to uneven coverage, while cold weather can prevent the stain from curing properly. Professional fence staining services recommend staining during mild, dry conditions to ensure a smooth, even finish.
Can a wood fence be stained if it was previously painted?
Yes, but the paint must be completely removed before applying the stain. Paint creates a barrier that prevents the stain from penetrating the wood, which can cause peeling and uneven coloring. Professional fence staining services use specialized stripping agents and sanding techniques to remove old paint and prepare the wood for staining.
How does the type of wood affect the staining process?
Softwoods like pine and cedar absorb stain more easily than hardwoods like oak and teak. Hardwoods may require multiple coats or longer drying times to achieve even coverage. Professional fence staining services adjust their approach based on the wood type to ensure proper absorption and consistent color.
Is it necessary to use a wood conditioner before staining?
A wood conditioner is not always necessary but can help improve stain absorption, especially for softwoods like pine. It prevents blotchiness and uneven color by balancing the wood’s ability to absorb the stain. Professional fence staining services may recommend using a conditioner when working with uneven or highly porous wood.
Can stain be applied over an existing water-repellent coating?
No, water-repellent coatings create a barrier that prevents the stain from soaking into the wood. The coating must be stripped or sanded off before applying the stain to allow proper penetration. Professional fence staining services use specialized cleaning and stripping techniques to remove water-repellent products and ensure proper stain adhesion.
Revitalize Your Home with Prospect House Painting Pros!
Bring new life to your home with the skilled painters at Prospect House Painting Pros in Prospect, CT. Our team specializes in both interior and exterior painting, using premium materials and expert techniques to achieve a smooth, lasting finish. From careful prep work to the final brushstroke, we focus on delivering exceptional results.
Elevate your home’s look and boost its value—schedule an estimate with Prospect House Painting Pros today!